Shopify onsite payments app
Last updated: May 6, 2026
Follow this guide to get started with Checkout.com's onsite payments app for Shopify, from installing the app to performing your first test payment.
Note
- This page is for the current version of the Shopify onsite payments app. If Shopify has extended your migration deadline due to a compatibility issue with Shopify's checkout extensibility, see Shopify onsite plugin - previous.
- As per Shopify’s requirements, the new Shopify onsite payments app is not compatible with any
checkout.liquidcustomizations you may have. If you've customized yourcheckout.liquidtemplate, upgrade to checkout extensibility. - To use Checkout.com’s onsite payments app, you must upgrade to the new Shopify checkout version. Shopify does not support the classic checkout version.
The Shopify onsite payments app supports the following payment methods:
- Apple Pay
- Google Pay
- Card payments
- American Express
- Cartes Bancaires
- Diners Club International
- Discover
- JCB
- Mada
- Mastercard
- UnionPay
- Visa
Information
Before you integrate with Shopify, make sure that you are successfully onboarded to Checkout.com's platform.
You need access to both the Shopify Admin Portal and the Checkout.com Dashboard.
- Sign in to your Checkout.com sandbox Dashboard.
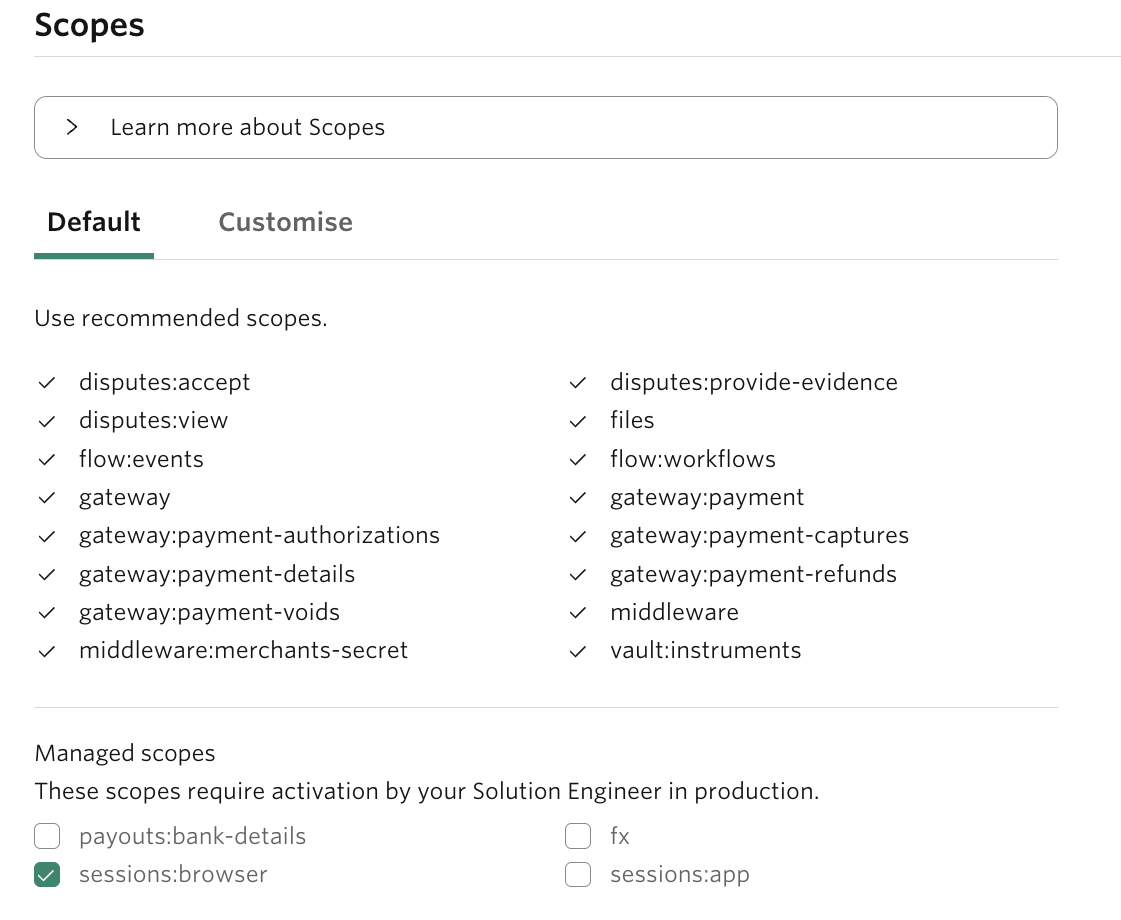
- Create an OAuth 2.0 key pair and ensure you select the following scopes:
- Default scope
- sessions:browser under Managed scopes
- One or more processing channels that you want to use for this integration. If you select more than one processing channel, you must provide the processing channel ID in the configuration page of your app.
- Select Create key.
- Store the client ID and client secret values securely. You cannot view them again after they're generated.
Information
If you create an API Key with the Allow any processing channel option enabled, you must provide the processing channel ID in the configuration page of your app to prevent payments from failing.
- Browse to the Checkout.com Onsite Payments App listing on the Shopify app store, and then select Add app.
- Shopify redirects you to your store and prompts you to install the Checkout.com Onsite Payments App. Select Install app.
After installing the app, you must configure its settings before activation.

- In Shopify, select Manage and enter the following:
- Your API credentials
- Your 3DS settings preferences
- Your billing descriptor details
- Select Save.
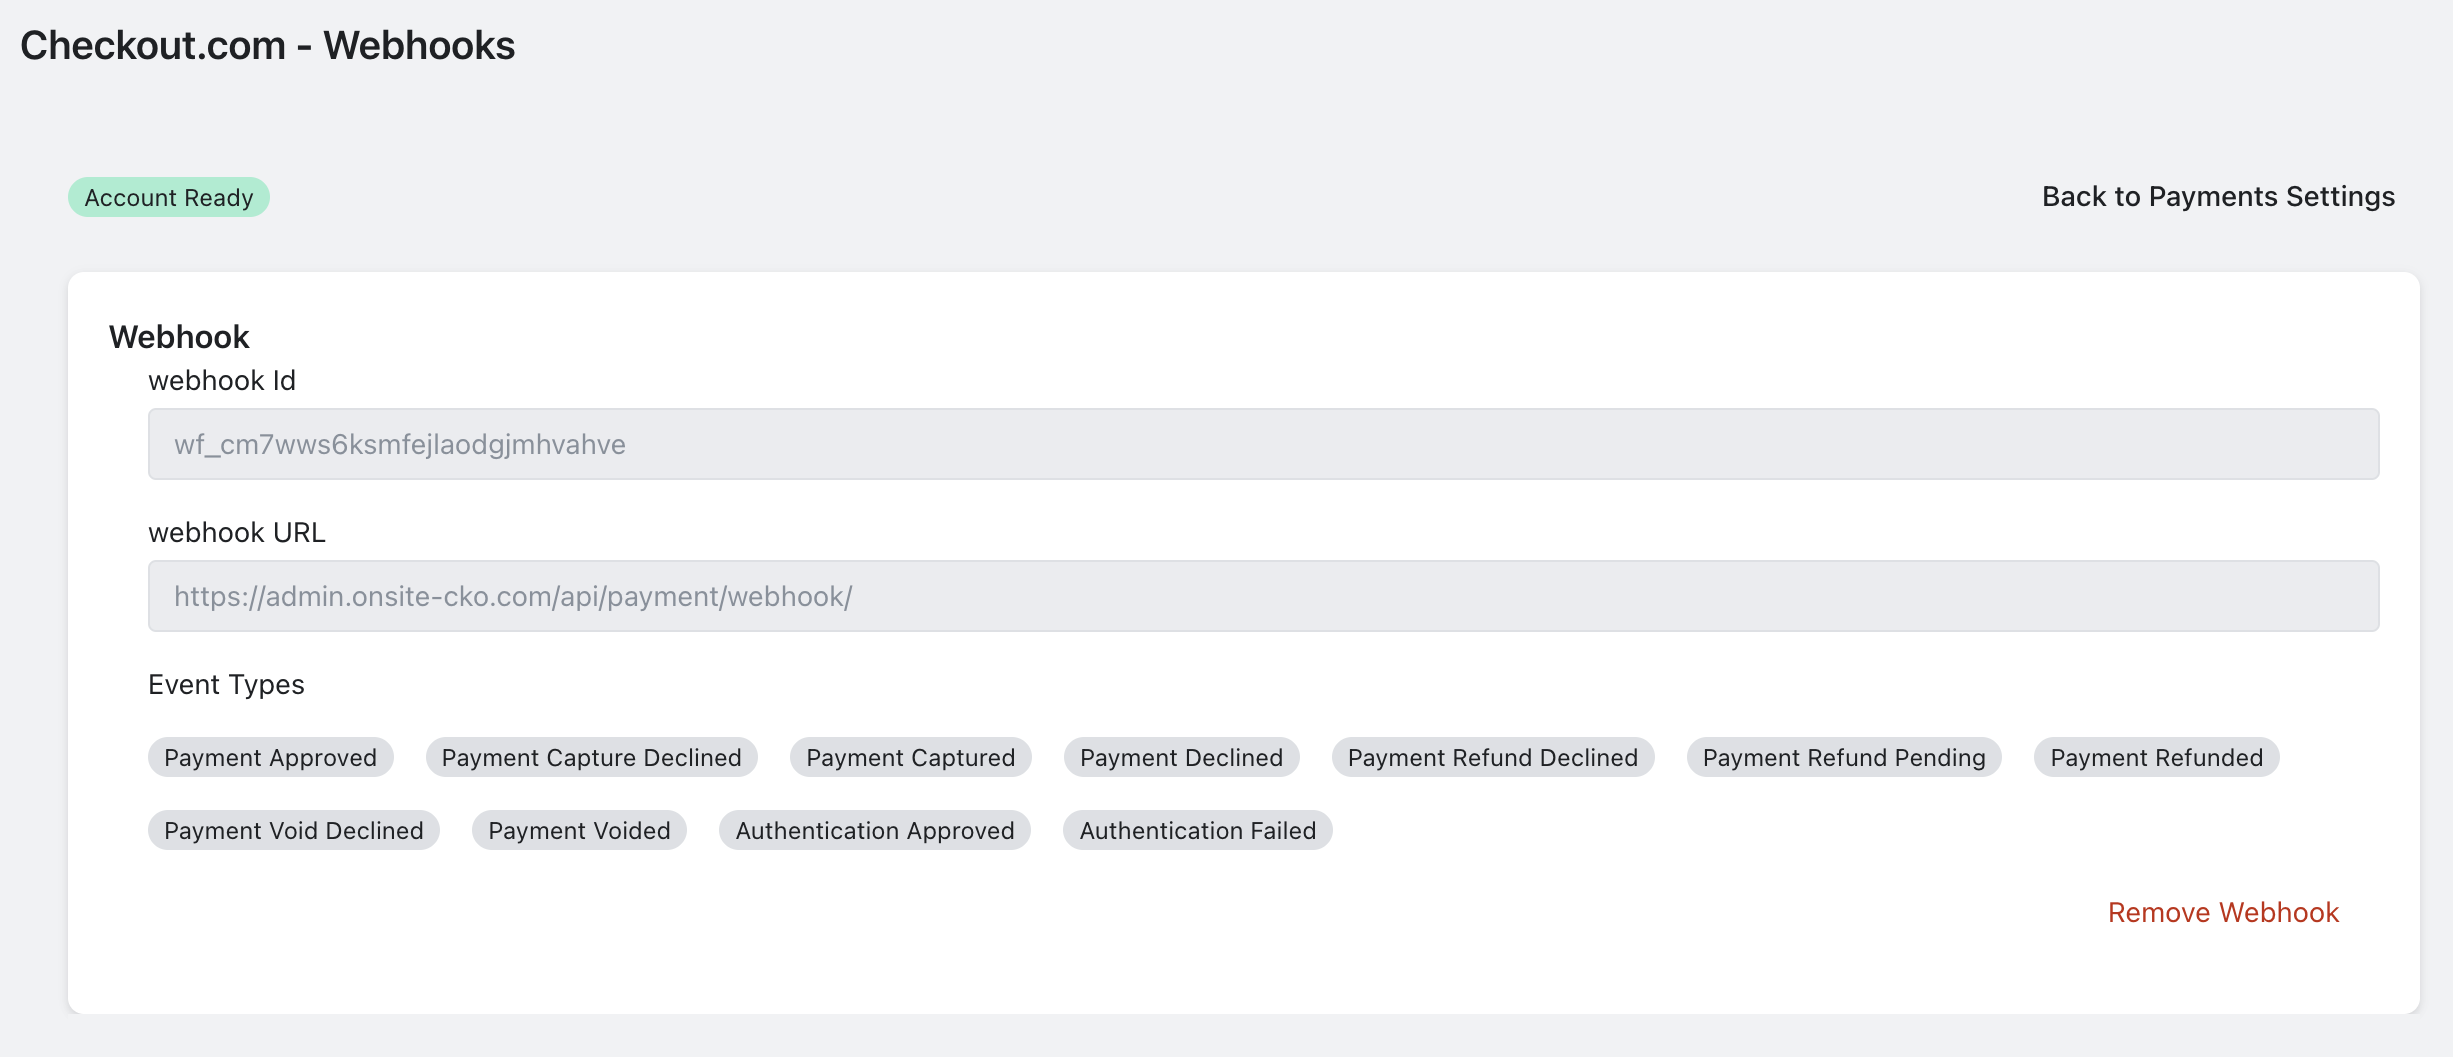
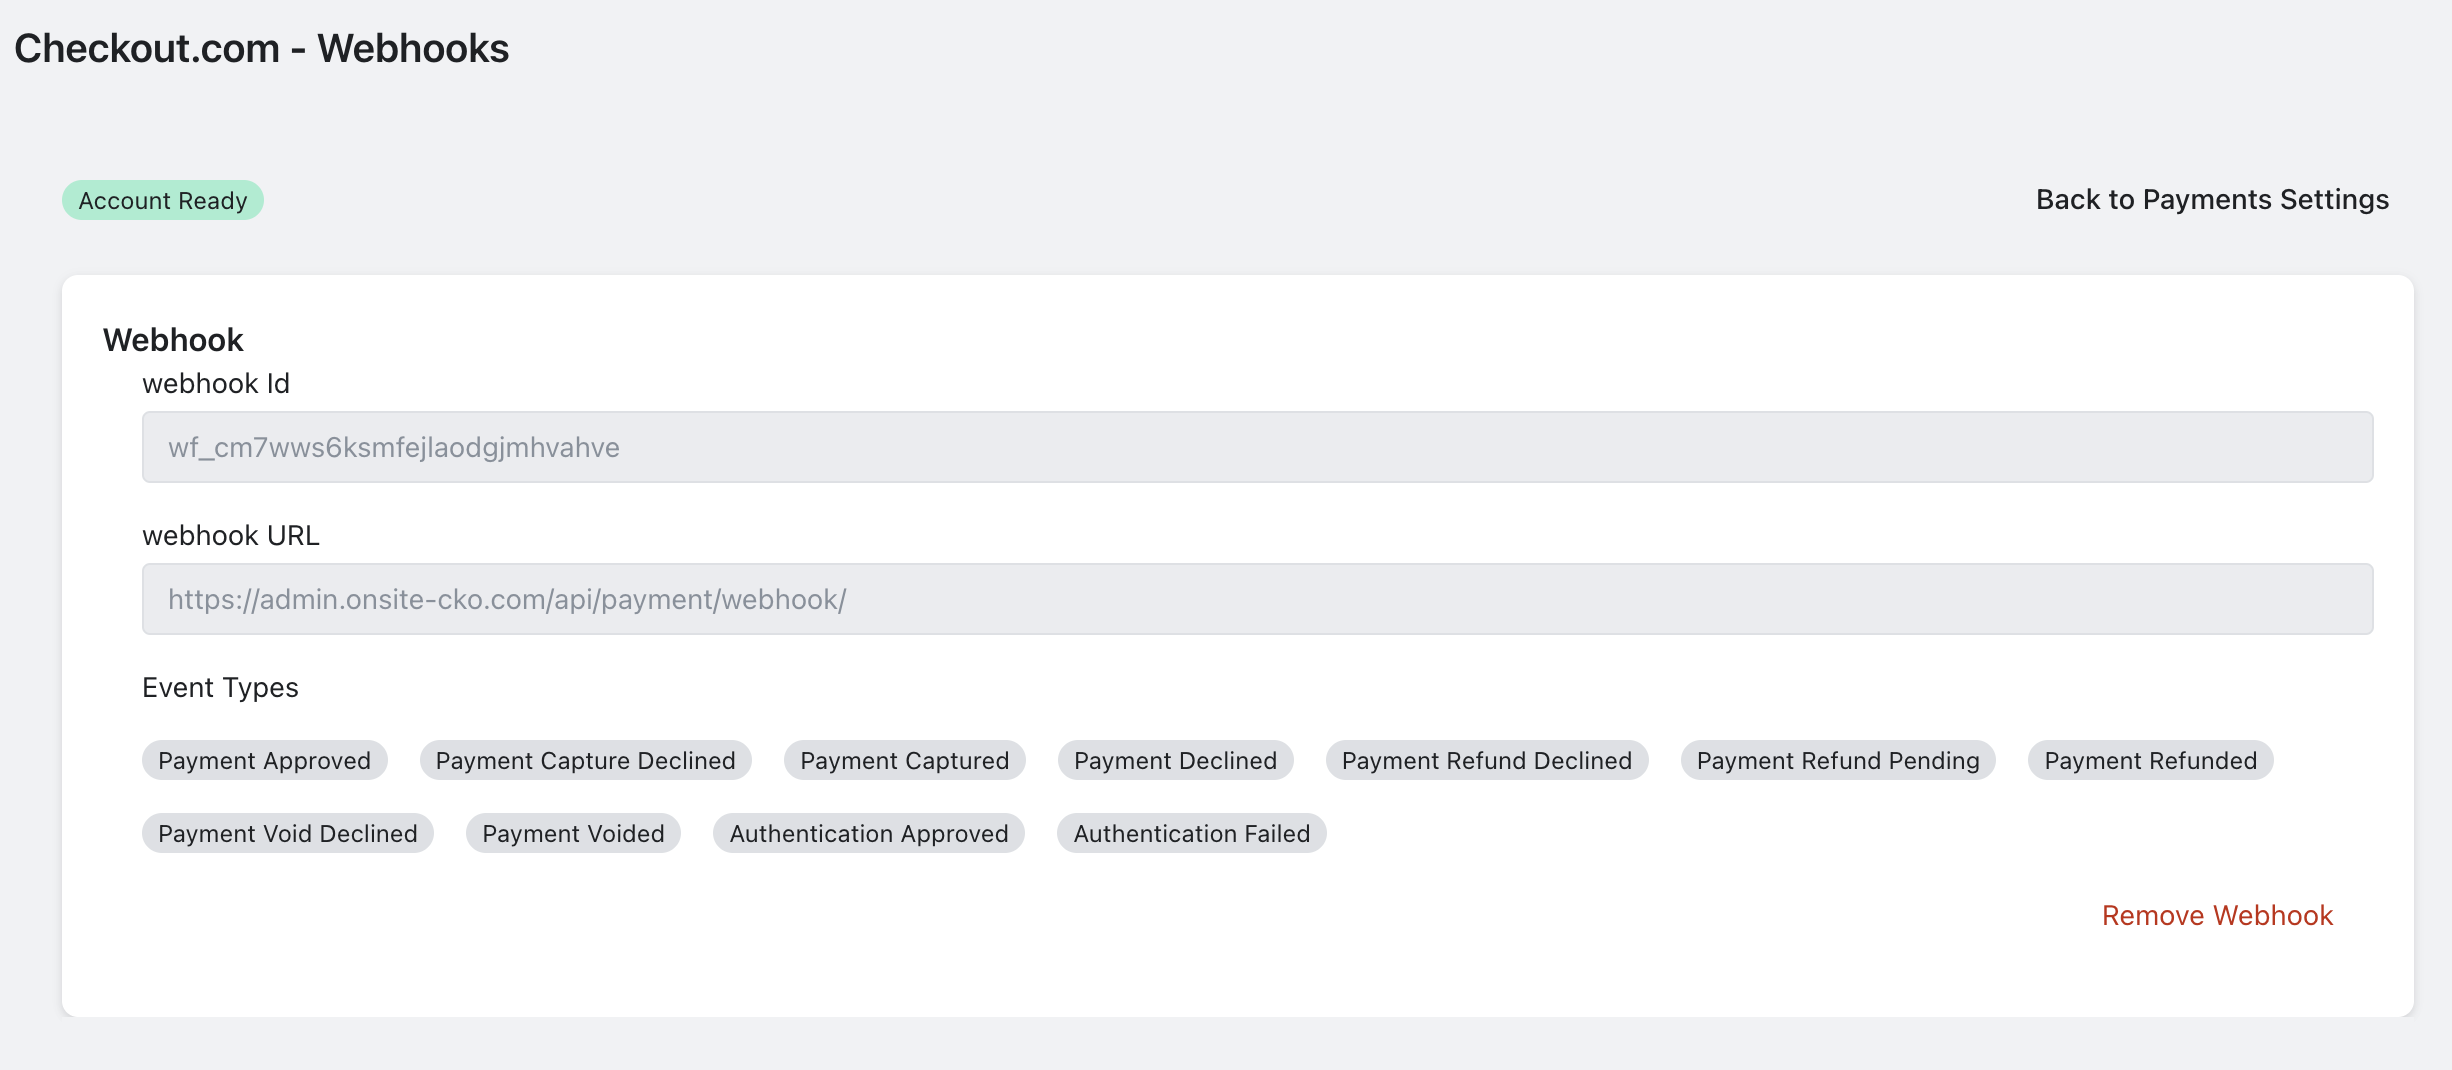
- Go to Webhooks.
- Select Register Webhook and ensure the webhook is created successfully.
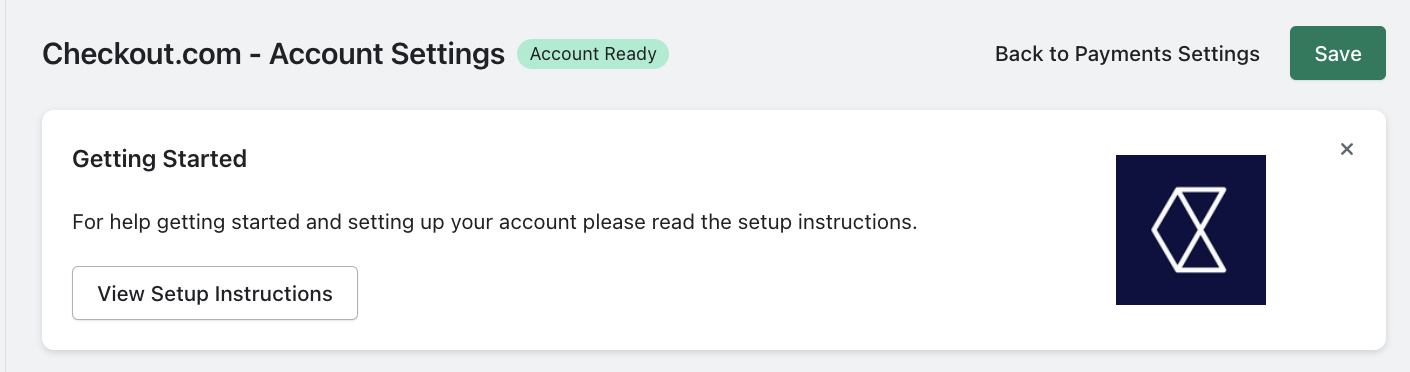
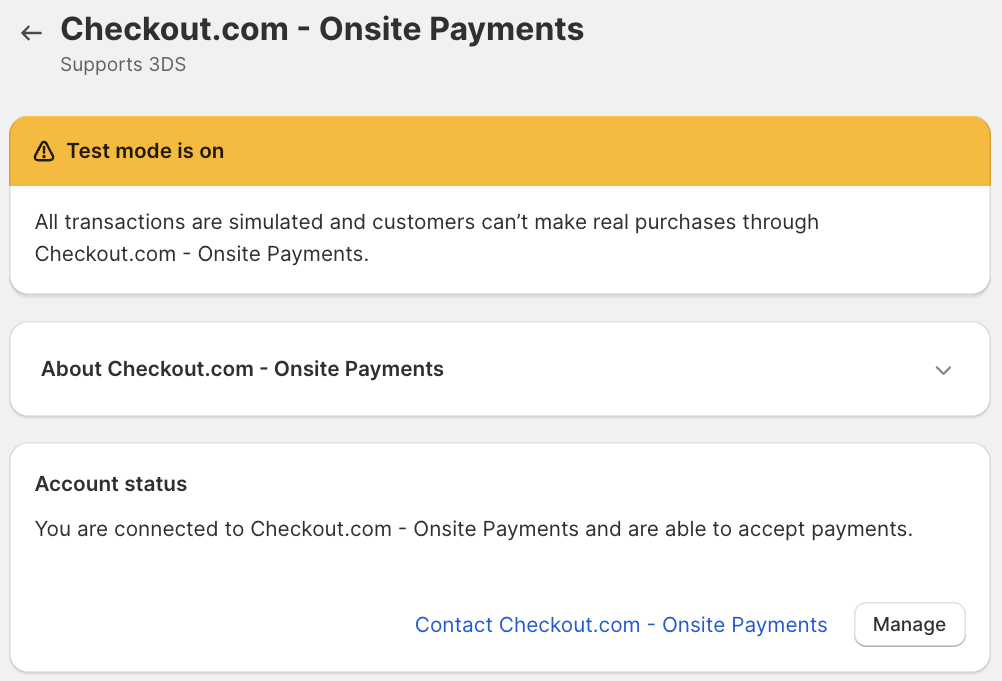
- In the Account Settings section, check that the Account Not Ready tag has changed to Account Ready.
- Select Back to Payments Settings. You are redirected to the Alternative providers page in your Shopify store.
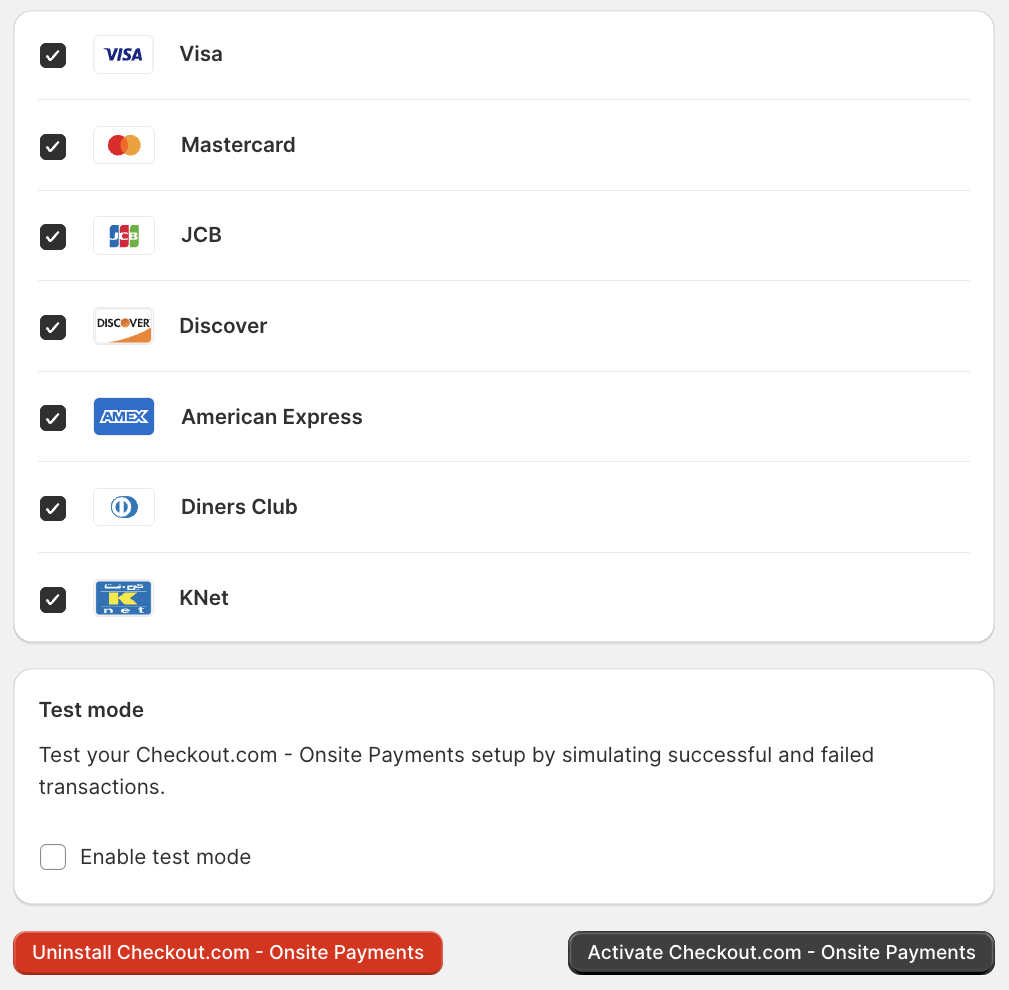
- Optionally, select Enable test mode if testing your integration using the sandbox mode.
- Select Activate Checkout.com Onsite Payments.
Information
Only configure webhooks within Shopify. You do not need to configure them in your Checkout.com account once they're configured in Shopify.
Information
When testing in the sandbox environment, ensure you are using sandbox API keys and not production API keys.
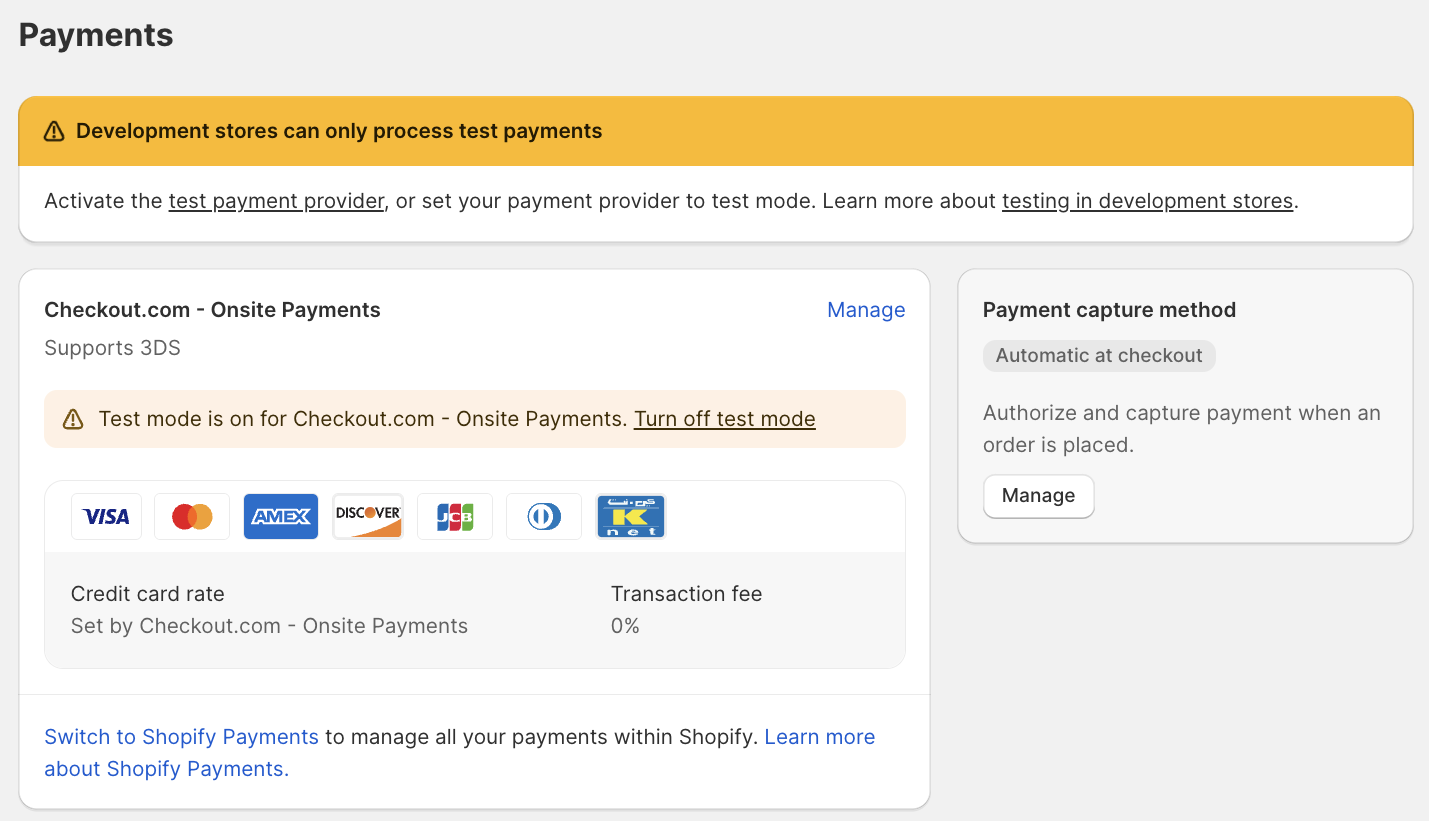
- In the Shopify Admin Portal, go to Settings > Payments.
- Under Checkout.com Onsite Payments, select Manage.
- In the Test mode section, select Enable test mode.
- In the app’s settings page, ensure Sandbox mode is enabled.
- Browse to your storefront and add a product to your cart.
- Select your cart, and then proceed to checkout.
- Enter the required billing details. We recommend using a real email address so you can receive the order confirmation.
- Select Continue to shipping, and then Continue to payment.
- Enter the following card details:
- Number –
4242 4242 4242 4242 - Expiry date –
Any date in the future - CVV –
100
- Number –
- Select Pay. After completing the 3DS authentication simulator, you're redirected to the order confirmation page. If you entered a real email address in the billing details, you also receive an order confirmation email.
- In the Shopify store admin, browse to Orders to confirm that the order has gone through.
- Sign in to your Checkout.com sandbox Dashboard.
- Go to Payments > Processing > All Payments. The order payment is displayed along with the status. For example, Captured.
After you have finished testing, follow these steps to go live.
Information
When creating API credentials for your production environment, ensure that you select the same scopes and processing channel as you did for your sandbox API credentials.
- Sign in to your Checkout.com live Dashboard.
- Create an OAuth 2.0 key pair.
- Ensure the following are selected:
- Default scope
- sessions:browser under Managed scopes
- Only one processing channel
- Select Create key.
- Store the client ID and client secret values securely. You cannot view them again after they're generated.
- For production, you must have Full Card API enabled for your processing channel. To enable full card processing on your account, contact your solution engineer or request support.
- If you need 3DS, you must enable the sessions:browser scope for your OAuth key pair. To enable 3DS, contact your account manager or request support. Provide your account name as it appears in the Checkout.com Dashboard and the ID of your production API key.
- In your Shopify store's back office, go to Settings, Payments, and then select Manage next to Checkout.com Onsite Payments.
- Select Manage in the Account Status section.
- On the app's configuration page, replace the API credentials with the production credentials you generated.
- Select Disabled to disable sandbox mode, and then select Save.
- Check that the app’s status tag is now Account Not Ready.
- Go to Webhooks.
- Select Register Webhook and ensure the webhook was created successfully.
- In the Account Settings section, ensure that the Account Not Ready tag has changed to Account Ready.
- Select Back to Payments Settings to return to your store’s Payments page.
- Deselect Enable Test mode.
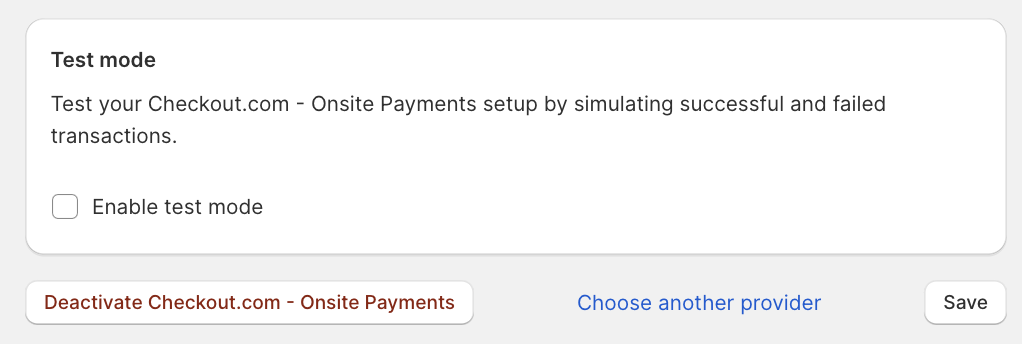
- Select Save.
You are now live with the Checkout.com onsite payments app.
To enable Apple Pay or Google Pay in your Shopify onsite payments app:
- Sign in to your Shopify admin's back office.
- Go to the Settings > Payments page, and select Manage.
- Scroll down the page to view the available payment options and select Apple Pay and Google Pay.
- Select Save.
Note
To offer Apple Pay as a payment option for your customers, you must follow Apple's Acceptable Use Guidelines.
Note
Do not process refunds using the Checkout.com Dashboard or API. You must process refunds using the Shopify Order Management interface in your store’s back office. This maintains end-to-end order integrity on the Shopify platform.
After migrating to the new integration, orders from your original integration are still available for post-authorization actions within Shopify's Order Management interface.
You can refund, capture, and void payments that were processed using the original integration using the Shopify Order Management interface in your store’s back office.